Using Glue Studio
Using AWS Glue Studio to create ETL processes
The aim of this guide is to help you get started in creating and testing your Glue jobs.
Once your Glue job is ready and working as expected, you can refer to this guide to deploy your Glue job to the Data Platform Production environment. You should keep your original Glue job (which was created in Glue Studio) should you need to make further improvements to it in the future and refer to the note at the bottom of section 1 of Deploying Glue jobs to the Data Platform, to re-deploy the new version to the Data Platform Production environment.
AWS Glue Studio is a new graphical interface that makes it easy to create, run, and monitor extract, transform, and load (ETL) jobs in AWS Glue.
To use AWS Glue Studio the job needs to be created manually. This guide includes the steps needed to create an editable job in Glue Studio. Templates may have already been created and existing jobs can be duplicated to make it easier to get started with Glue Studio. Dynamically created scripts using terraform (the infrastructure as code tool Hackney use) will not have the ability to use the visual editor.
Note: If a job has already been created manually you can select the job using the radio button and in the job Actions mennu, select Clone job.
Creating a new Glue job
Note: The instructions below assume an S3 Data Source and Target Location.
- Log in to AWS Management Console.
- Select the AWS Glue service from the services menu (or search field).
- From the AWS Glue menu ETL section, select AWS Glue Studio.
- From the AWS Glue Studio main page, choose the Create and manage jobs option.
- Within the Create Job section, select Source and target added to the graph and select desired Source and Target values.
- Click the Create button.
- In the Visual editor that is now displayed, click on the Data Source - S3 box and in the Data source properties - S3 tab to set S3 source type to S3 location and set the S3 URL for the source data. To reduce the time your job takes to run, you can follow these steps to pre-filter the source data passed to your transformation step.
- Also Data Target - S3 box and in the Data target properties - S3 tab set the S3 URL for the data target, usually your department folder in the Data Platform account. NB: You can add additional folders at this point for your new data within your department folder. Each department has an unrestricted directory within each zone where unrestricted datasets can be stored, in order to add further cross-department insights and maintain datasets. There is also an unrestricted department which allows users to maintain datasets which don't have access restrictions across each zoneData source and data target (amongst other operations) must be set to be able to save the job. You can also apply Transformations specific to your job via the Visual tab. See the AWS Glue Studio Documentation.
- To complete the set up you need to select the Job details tab.
- Complete the Name and optional Description fields. You may use this job as a template for repeat use, so a generic name to use as a template might be useful to begin with.
- Select dataplatform-{environment}-glue-role where environment is either 'stg' or 'prod'; as the IAM Role for the job.
- The remaining standard fields default values are usually fine to use. The programming language Glue Studio creates can be Scala or Python.
- In Advanced properties check the Script filename refers to the task being carried out.
- Set the Script path to the central scripts S3 bucket:
s3://dataplatform-{environment}-glue-scripts/custom/where environment is either 'stg' or 'prod' - you can create new folders or specify existing folders in the S3 bucket like this:s3://dataplatform-{environment}-glue-scripts/custom/YOUR_FOLDER_NAME/. - Set the Temporary path to the central temp storage S3 bucket:
s3://dataplatform-{environment}-glue-temp-storage/where environment is either 'stg' or 'prod'. - In Security configuration select the appropriate security configuration for your target bucket location (for example for the Raw Zone, use glue-job-security-configuration-to-raw).
- Ensure the Server-side encryption option is not checked, so that it uses the buckets default encryption configuration.
- In the Tags section, add the key
PlatformDepartmentand set the value as the name of your department. This should be the same name which was used to set up the department on the Data Platform. - Add any further libraries or parameters you need in the Advanced properties section.
Note: Exporting Data
When exporting data from your Glue Job it is important that you follow the Data Platforms partitioning stratagy. To do this, exports must be exported with the partitions import_year, import_month, import_day & import_date at a minimum. To accomplish this using AWS Glue Studio use the Add a partition key option at the bottom of the Data target node. It is important to further note, that inorder to add these attributes as partitions, they must exist within the dataset as fields.
Clone and edit an existing Glue job
- In the Your jobs sections, select the radio button of the job you would like to clone.
- In the Actions dropdown, select Clone job. If there is an information banner with a message Your job was created outside of Glue Studio and has no DAG available (see screenshot below) there will not be a Visual tab and therefore you will not have an interface to edit your job. Instead you will need to edit your job in the python job script. To do this navigate to the Script tab. If you prefer to use the interface, then select another job which has a Visual tab or create a new job as instructed in the Creating a new Glue job section above.

- In the Job Details tab, update the Name for your new job and check the Creating a new Glue job seciton above to ensure the configuration suits your needs.
- To save your job, select the Save button.
Pre-filter your source data for a glue job
By default, AWS glue will load all source data for a job before running the transformation steps. If the transformation is only interested in a subset of the data partitions, you can use a pushdown predicate to tell the glue job only to consider these partitions. If you have a large data set, this could have substantial performance benefits for your glue jobs (i.e. it will reduce the time it takes them to run).
Follow these steps to set this in Glue Studio.
- Navigate to the visual tab when viewing your glue job in glue studio.
- Select a "Data source" node.
- Staying in the "Data source properties - S3" tab, you should see the field "Partition predicate - optional", enter your predicate expression here.
The predicate must be Spark SQL syntax; Glue Studio provides an example of a predicate in the UI. Here is an example that only keeps records where the import_date (a standard partition used within the Data Platform) is within the last seven days.
to_date(import_date, 'yyyyMMdd') >= date_sub(current_date, 7)
For further reading around pushdown predicates and partitioned data in Glue jobs, AWS have some documentation on their use in AWS Glue ETL's and a blog post about working with partitioned data.
Monitoring a glue job run
We recommend that you enable continuous logging on your glue jobs, you can read more about this in AWS's documentation. Enabling continuous logging will allow you to view logs after your glue job has started.
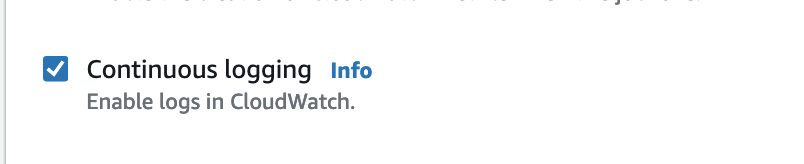
Continuous logging
Enabling continuous logging
To enable continous logging you need to check the "Continuous logging" box in the "Advanced properties" section of the job details.
Viewing logs with continuous logging enabled
To view the logs, navigate to the Runs tab and click on "All logs" under "Cloudwatch logs" in the run details, highlighted in the image below.
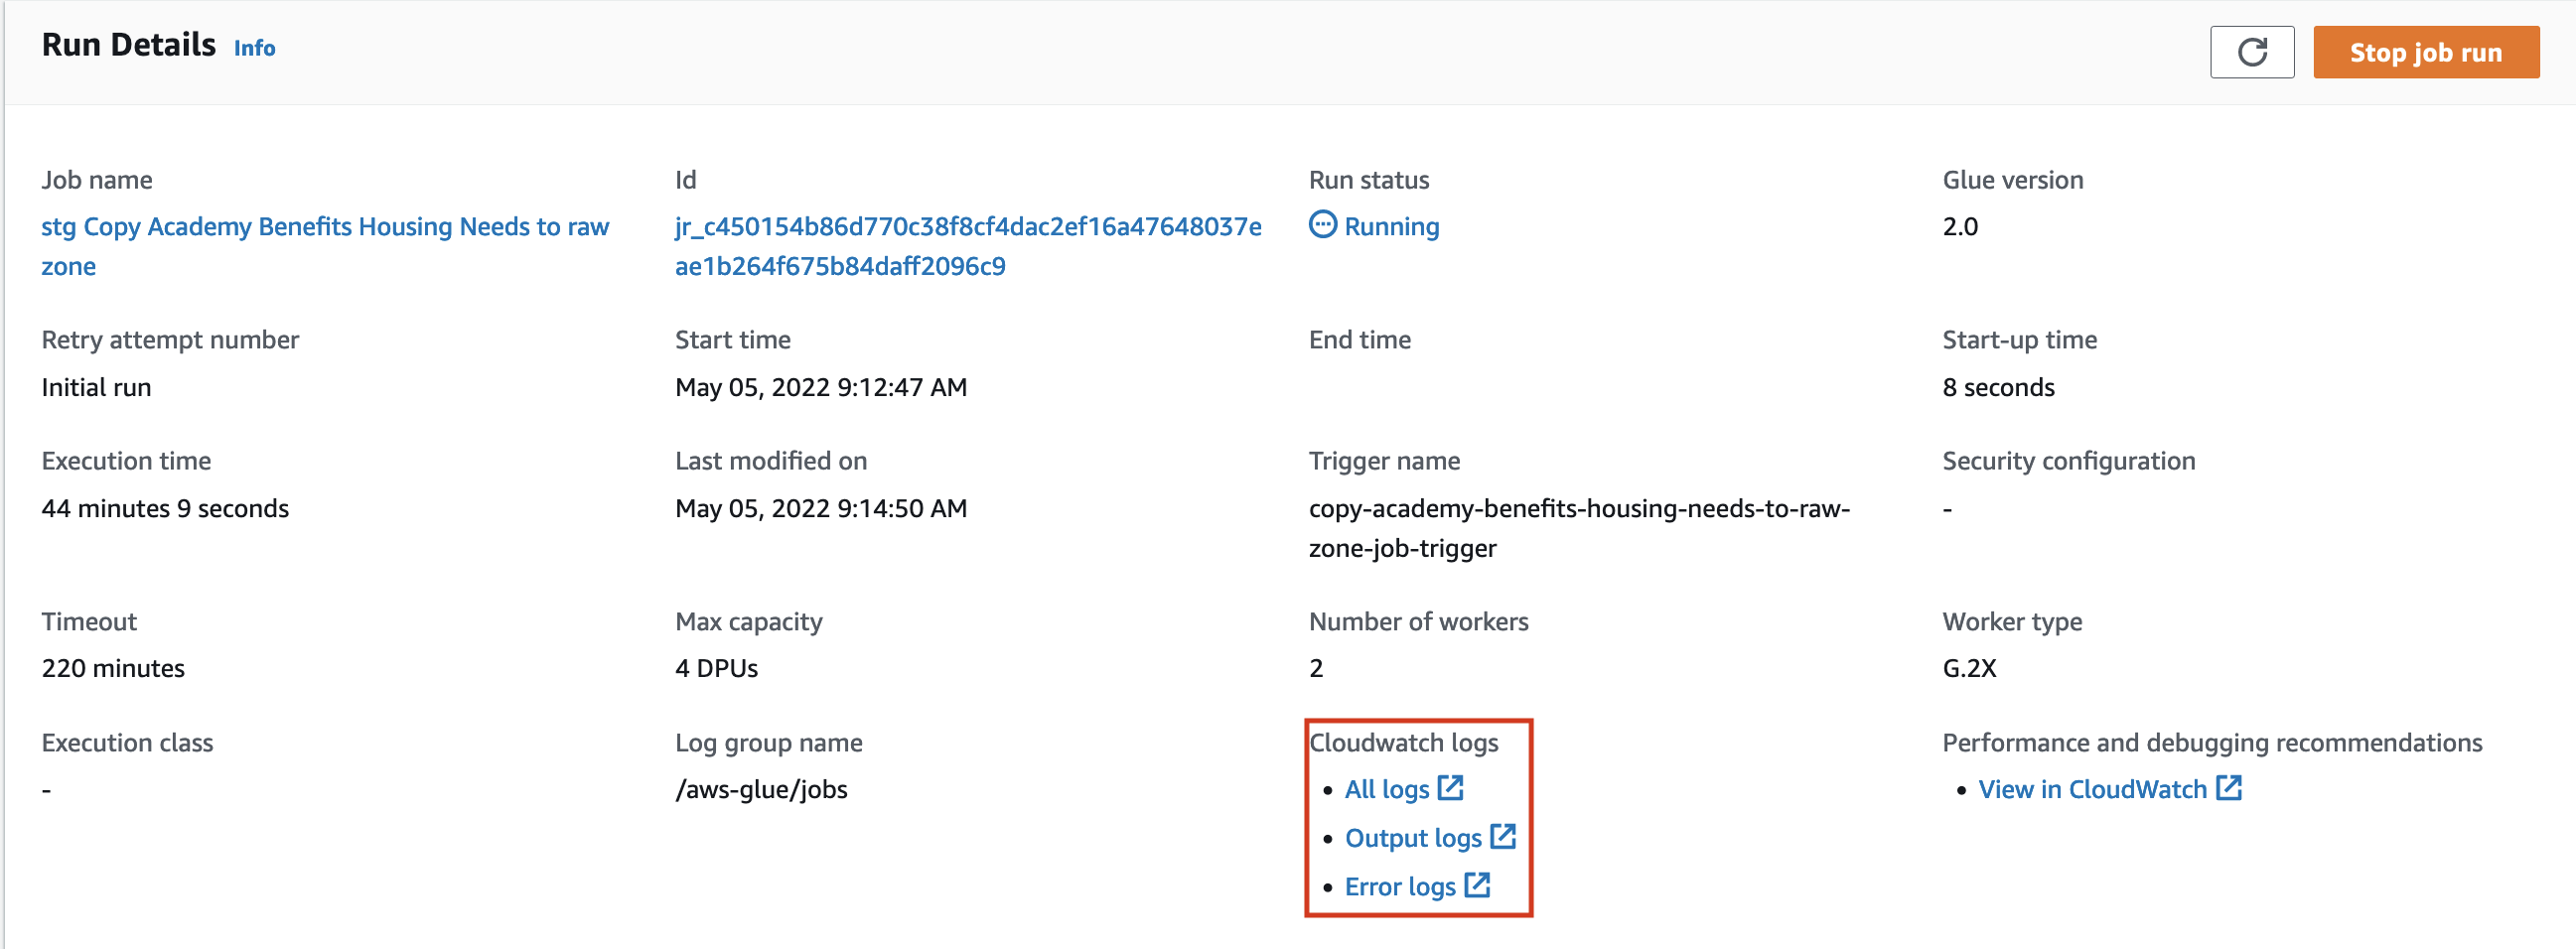 This will take you to the list of logs streams for that job run.
There will be one for each executor of the job, including the driver, most of the time the driver logs will hold the most helpful information.
The driver logs are in the stream postfixed by -driver, like in the screenshot below.
This will take you to the list of logs streams for that job run.
There will be one for each executor of the job, including the driver, most of the time the driver logs will hold the most helpful information.
The driver logs are in the stream postfixed by -driver, like in the screenshot below.
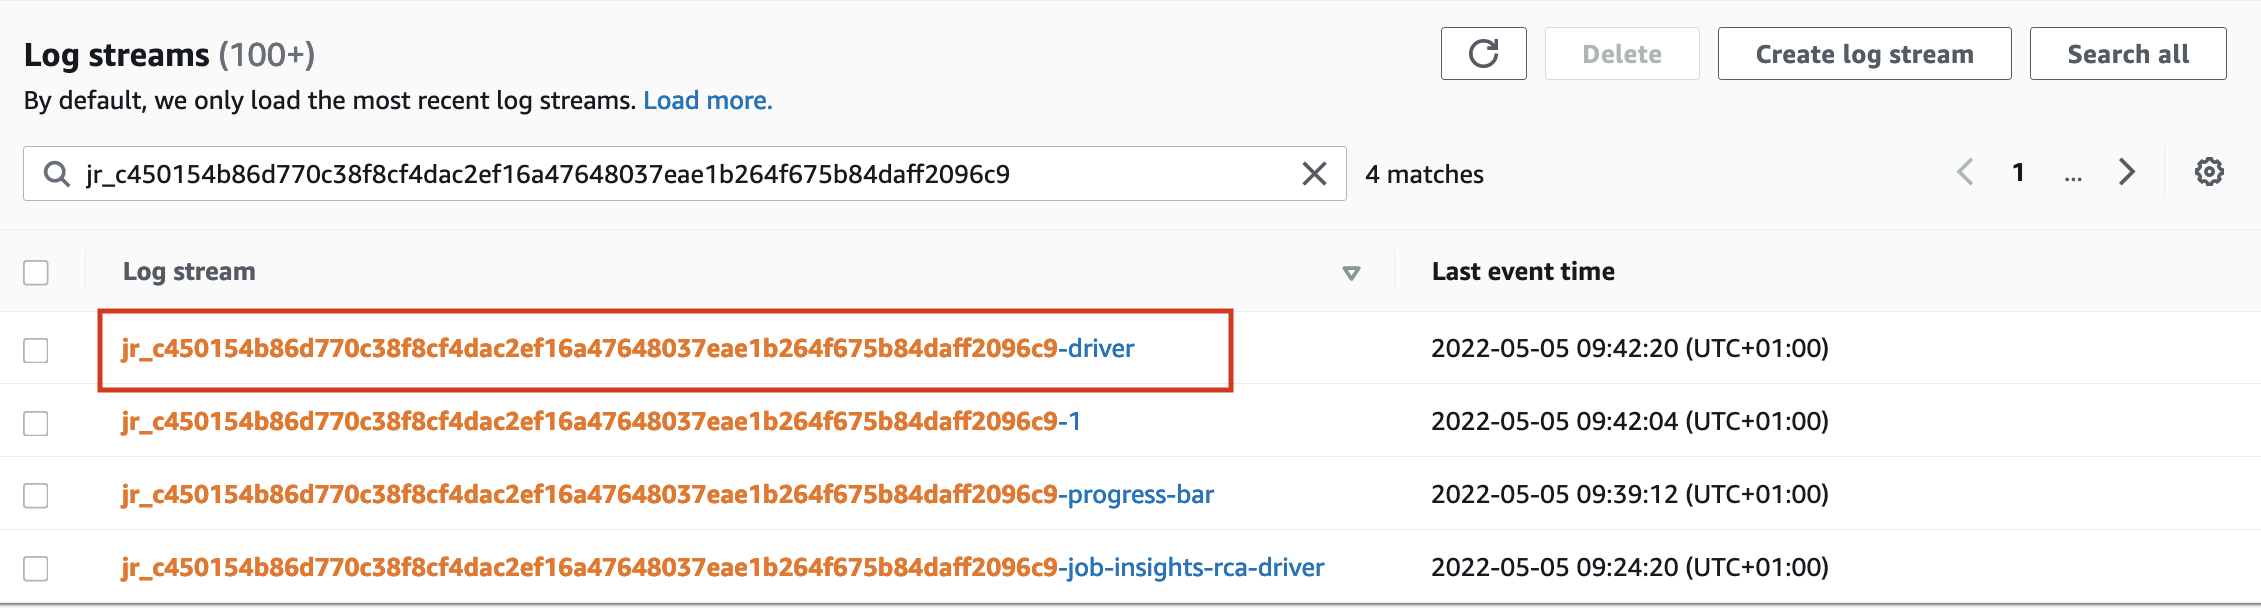 You can click on this log stream to see the logs.
When a glue job errors
Even without continuous logging you can still view the full error output after a glue job has failed. On the run details page it will only show a truncated version of the error message, often hiding the underlying error.
Viewing error logs
To view the error logs click on "Error logs" under "Cloudwatch logs" in the run details, highlighted in the image above.
This will take you to a list of logs streams for that job run.
There will be one for each executor of the job, including the driver, most of the time the driver logs will hold the most helpful information.
You can open up the logs for the driver by selecting the log stream which isn't postfixed by a second identifier.
The driver log stream is highlighted in the sreenshot below.
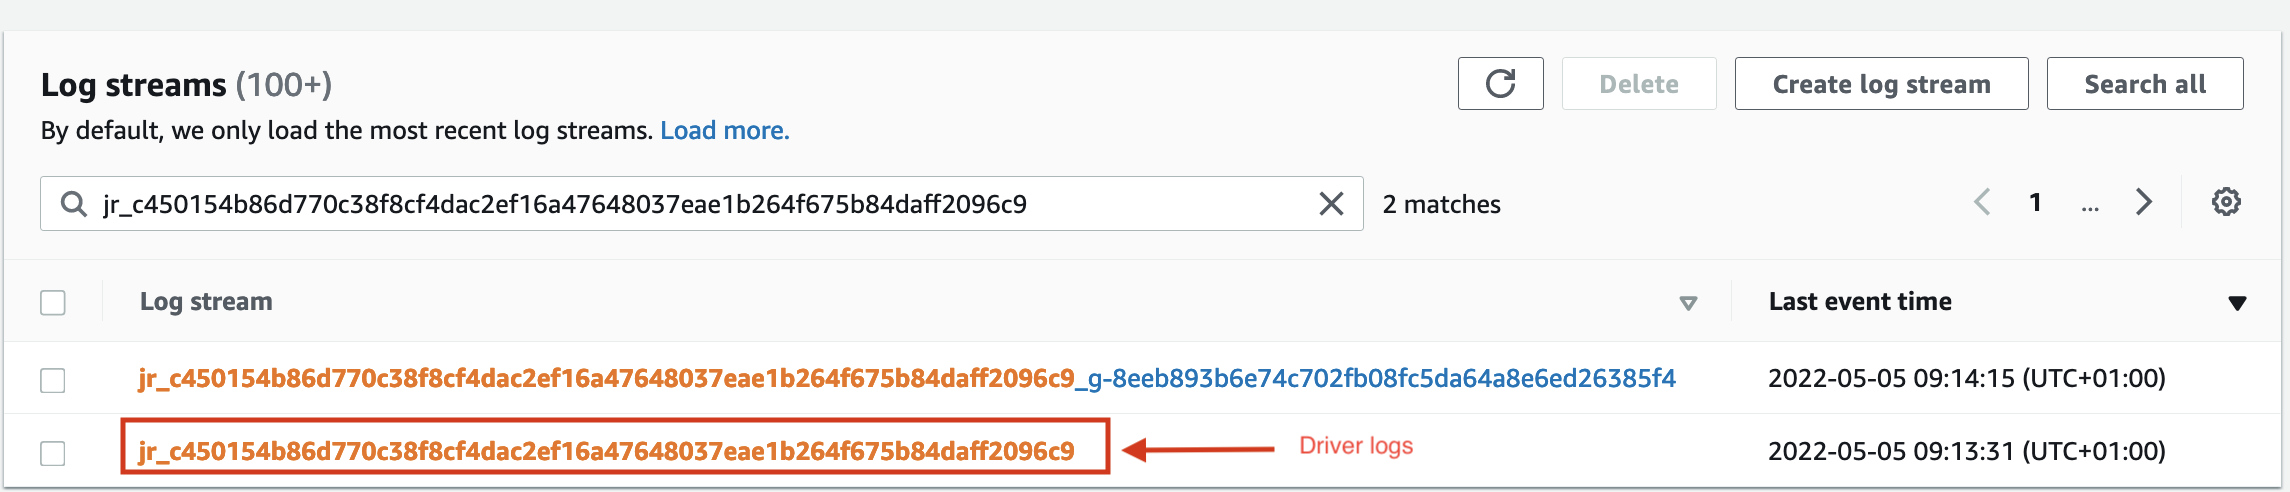 You may need to expand the log stream column size in order to see this.
Click on the driver logs to see the full error output and stack trace.
You may need to expand the log stream column size in order to see this.
Click on the driver logs to see the full error output and stack trace.
Finding the error in the error logs
There will be a lot of logs, most will be be for information, marked "INFO", you should looks at the ones marked with "ERROR". There may still be a couple marked "ERROR" so you should consider them all when looking for the error that caused your glue job to fail.
For an example, if you login to the pre-production AWS account then navigate to these logs. Looking from the bottom of the logs you first come accross an ERROR log that is mentioning an S3 Access Denied error (you can click the little arrow on the left to expand the message). This is an error with pushing the logs and isn't the reason the glue job failed. If you then scroll up a bit to the next ERROR, it contains a message that mentions "Error from Python:Traceback " and then follows on to give the stacktrace for the SQL error "DataType varchar is not supported.(line 54, pos 45)". This is the error which has failed the glue job.
Receive email notifications when Glue jobs fail
Each time a Glue job fails, an email notification with details of the error message is sent to the respective department, and their subscribed members.
The message will include:
- Name of the Glue job
- Error message
- Time of failure
- Job start time
- Job end time
- Job last modified time
- A link to log in to Hackney SSO and view the Job run details
In order to receive email notifications, you will need to ensure that you are subscribed to receive emails from your department's Google group and that you have confirmed your subscription to receive AWS Notifications when prompted.
Additionally, Spark Web UI is used to monitior and debug the glue jobs. Every 30 seconds, AWS Glue flushes the Spark event logs to an S3 bucket titled Spark UI Bucket.
Ensure the PlatformDepartment tag is correctly set in the Advanced details section in the Glue job's Job Details (see Creating a new Glue job section above).